

Create Certificates
Configure certificate rules for a course, set completion requirements, and let students download their certificates.
Certificates recognize students for completing a course. You configure the rules on a per-course basis — how much of the course must be completed, whether a final exercise must be passed, and when certificates expire. Students can then download their certificate from the Certificates tab in the LMS.
Configure certificate rules
Certificate options live in two places in your course. Download and the email message sit on the Certificates tab, under its Settings sub-tab. The rules that decide who qualifies sit on the course’s own Settings tab.
| What you want to set | Where |
|---|---|
| Allow students download certificate | Certificates > Settings |
| Email Message | Certificates > Settings |
| Minimum completion (%) | Course Settings |
| Final exercise (optional) | Course Settings |
| Minimum score on final exercise (%) | Course Settings |
| Course Completion Deadline | Course Settings |
On the Certificates tab
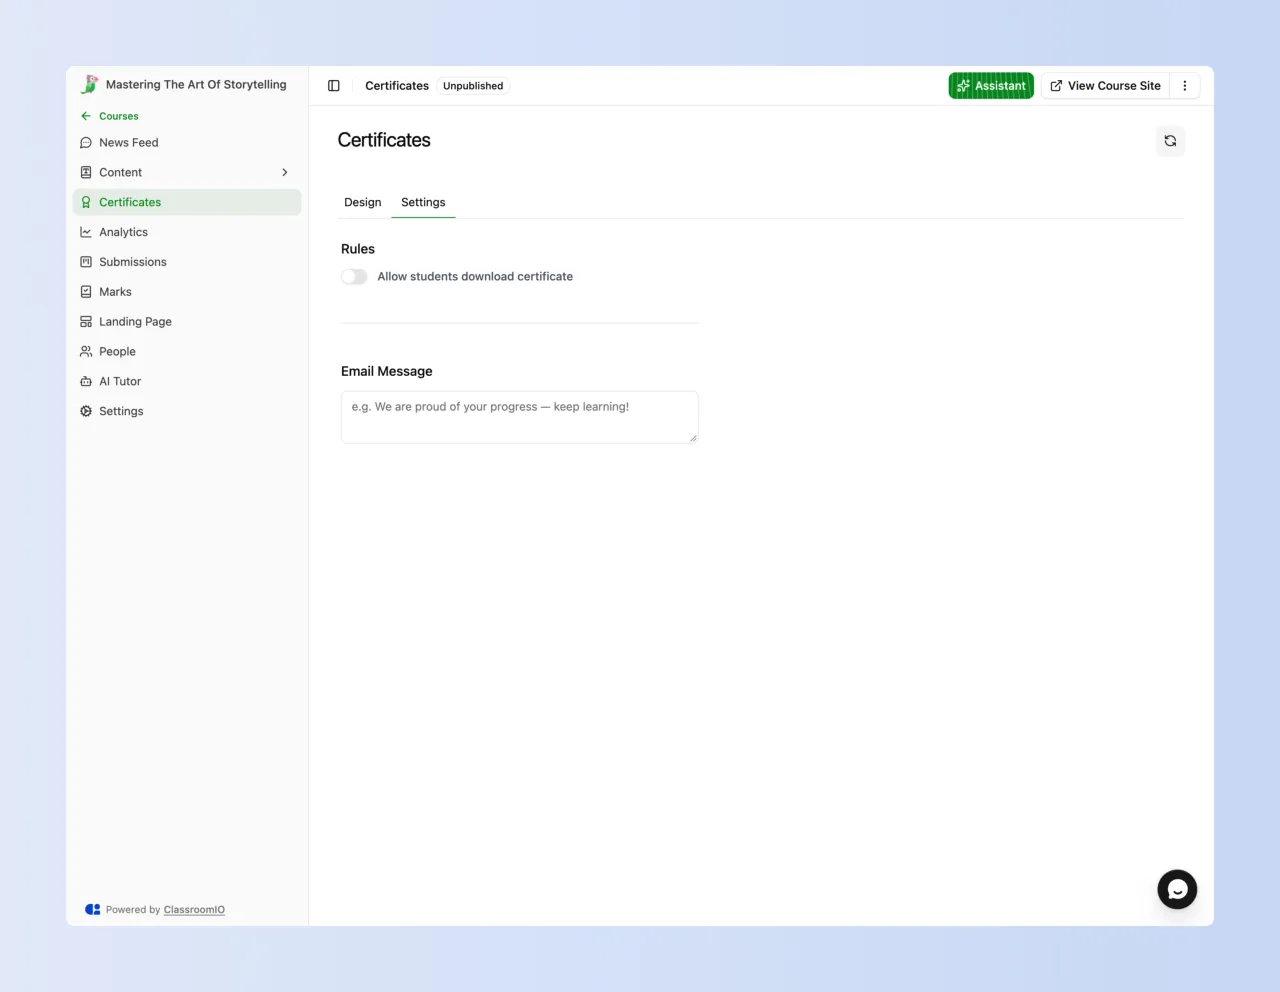
Open your course in the admin dashboard and go to the Certificates tab. It opens on the Design sub-tab, so click Settings next to it.
1. Let students download their certificate
Under Rules, turn on Allow students download certificate. Students who qualify still complete the course and earn their certificate record when this is off, but they cannot download the certificate itself.
2. Add a custom email message (optional)
Enter text under Email Message. This message is included in the notification email sent to students when they earn their certificate.
On the course Settings tab
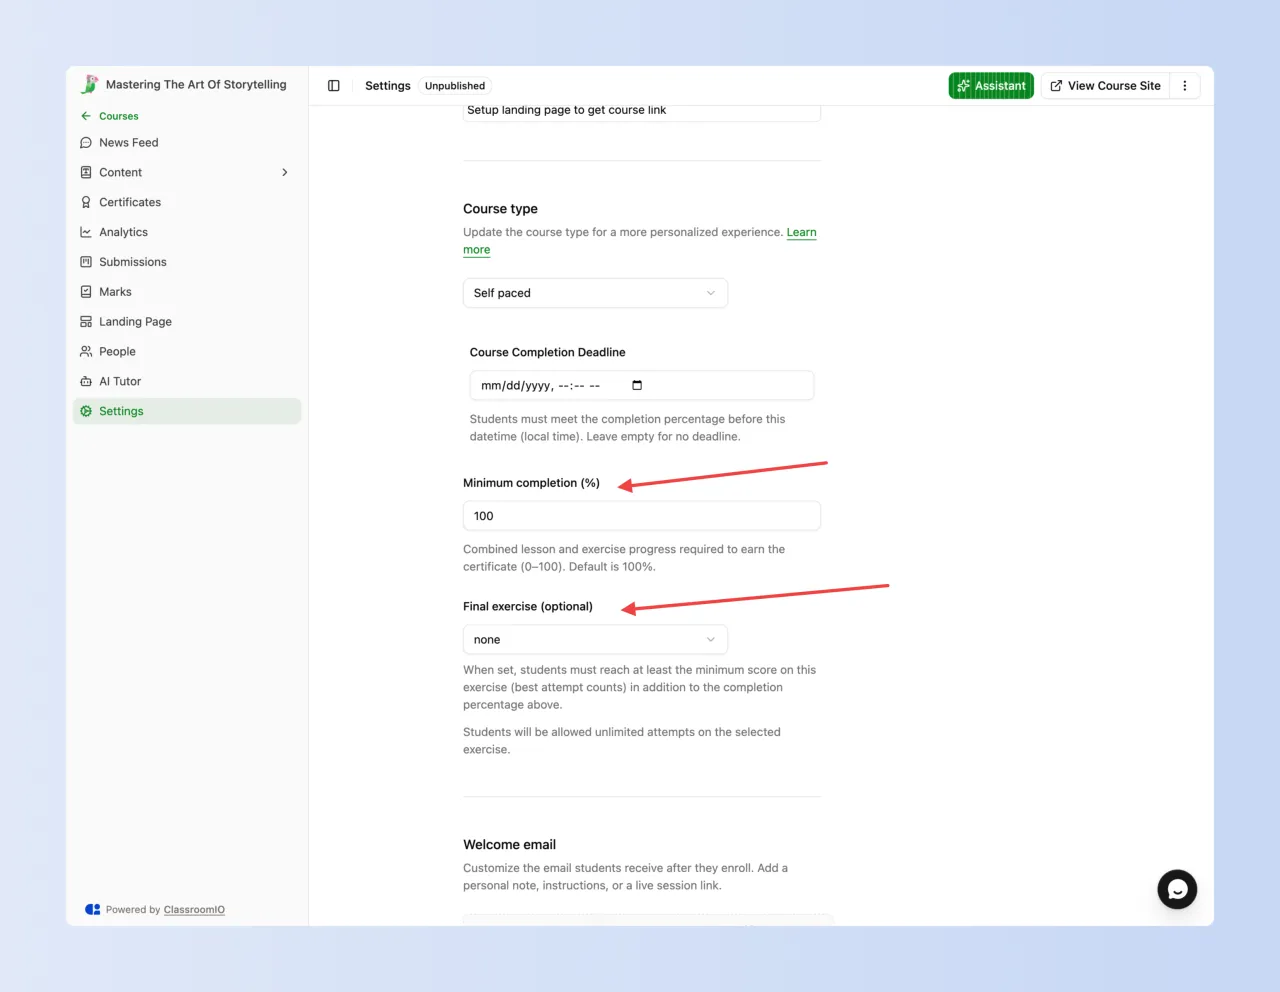
Leave Certificates and open the course’s Settings tab, then scroll to the Course type section. The four qualifying rules sit at the bottom of it.
1. Set a completion threshold
Enter a percentage in Minimum completion (%). This is combined lesson and exercise progress, and it defaults to 100%.
2. Require a final exercise (optional)
Select an exercise from Final exercise (optional). When set, the student must reach the minimum score on that specific exercise, in addition to meeting the overall completion percentage.
Minimum score on final exercise (%) appears once you pick an exercise. The student’s best attempt counts, and selecting an exercise here gives students unlimited attempts on it.
3. Set a deadline (optional)
Enter a date and time in Course Completion Deadline. Students must meet the completion percentage at or before this datetime, in local time. A student who finishes exactly on the deadline still qualifies. Leave it empty for no deadline.
Customize the design and add signatures
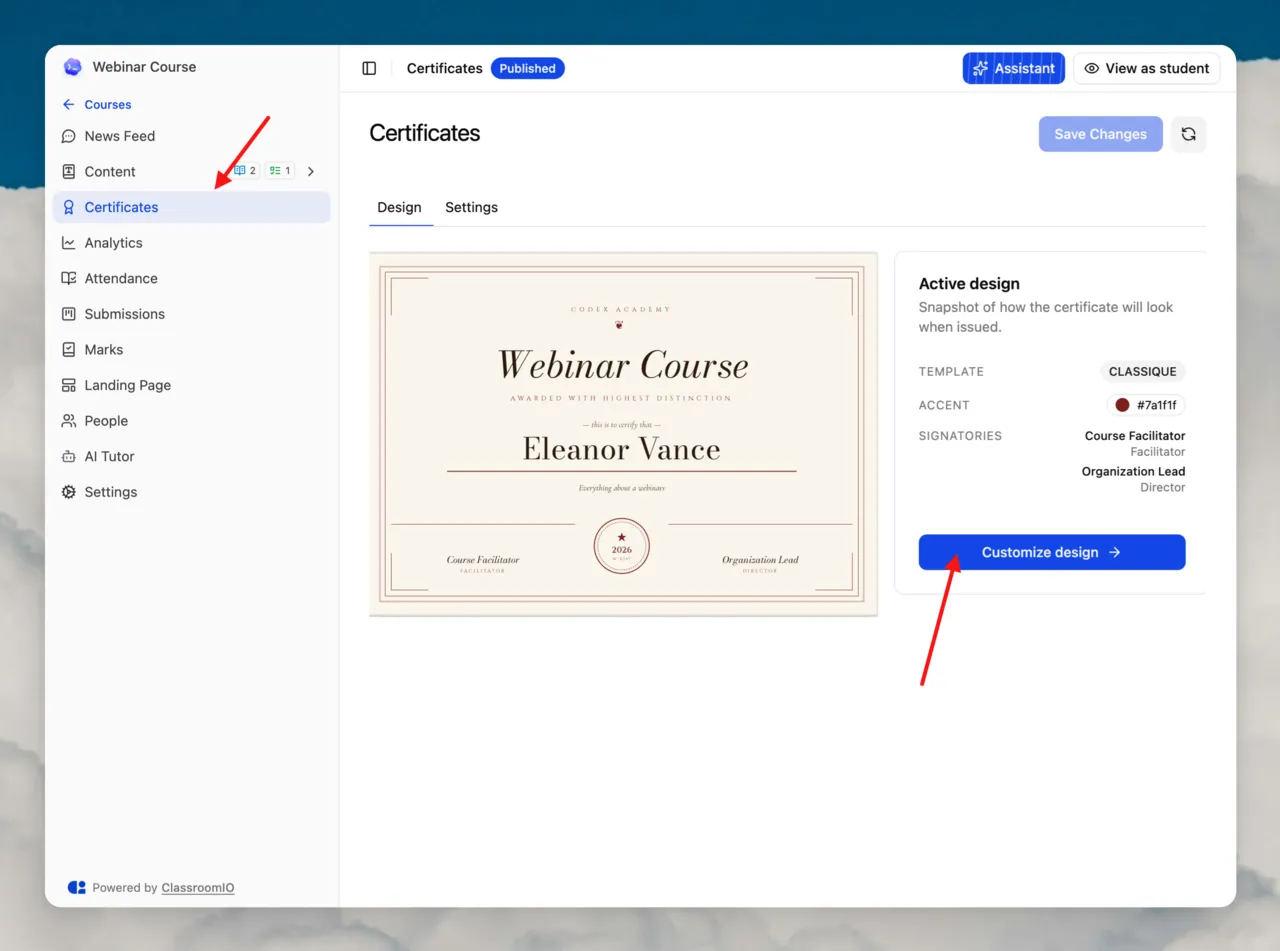
Set up how the certificate looks before the course goes live, so the first student to qualify gets the finished version. On the Certificates tab, open the Design sub-tab and click Customize design to open the certificate editor.
1. Pick a template and accent color
Choose a Template and an accent color to match your brand. A live preview shows the result as you change it.
2. Add signatories and signatures
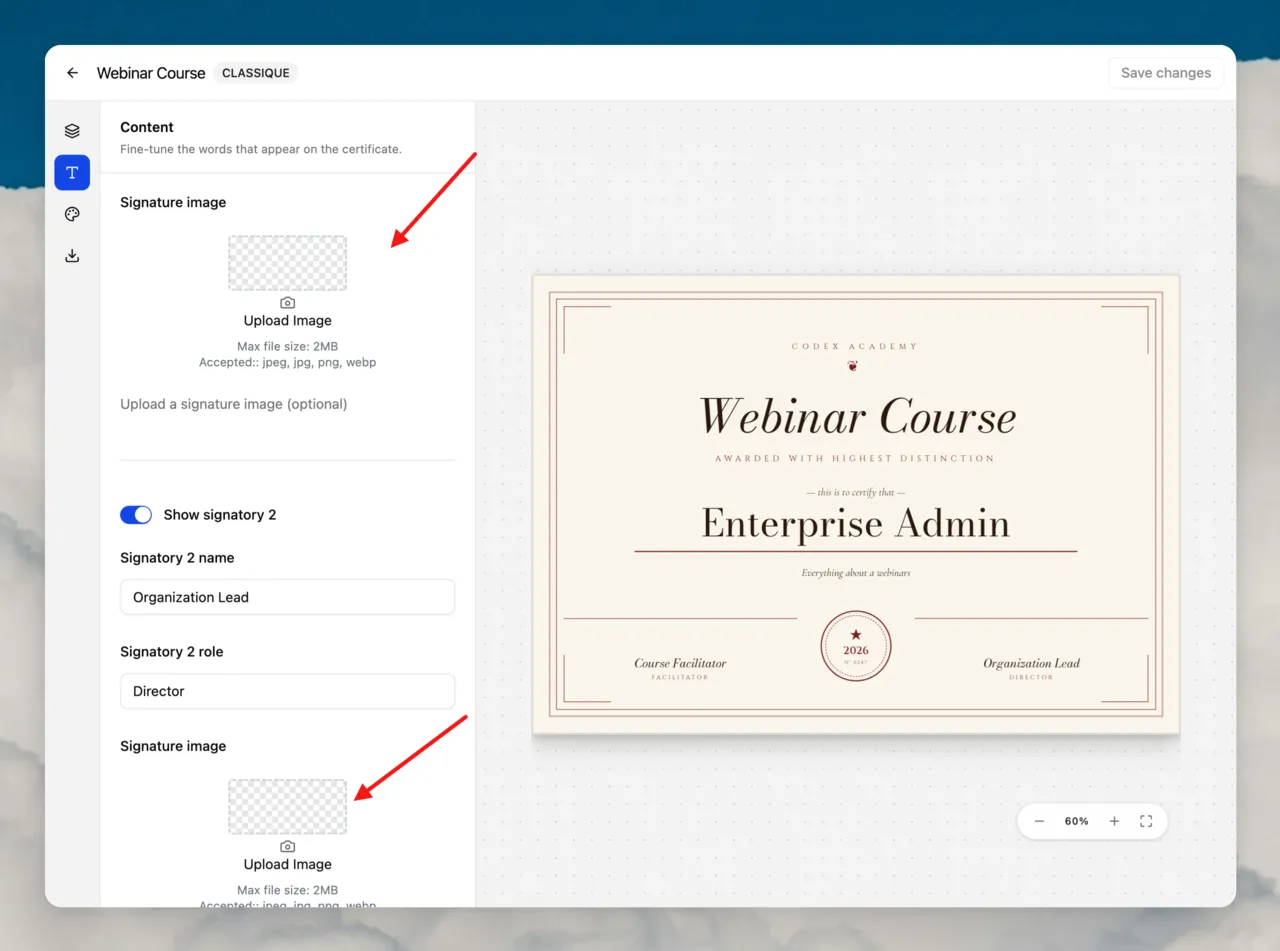
Under Signatories, turn on Show signatory 1 and fill in Signatory 1 name and Signatory 1 role, then use Signature image to upload a signature graphic. You can enable a second signatory the same way.
3. Set the certificate ID format (optional)
Set a Certificate ID format so every issued certificate carries a unique, verifiable reference.
What students see
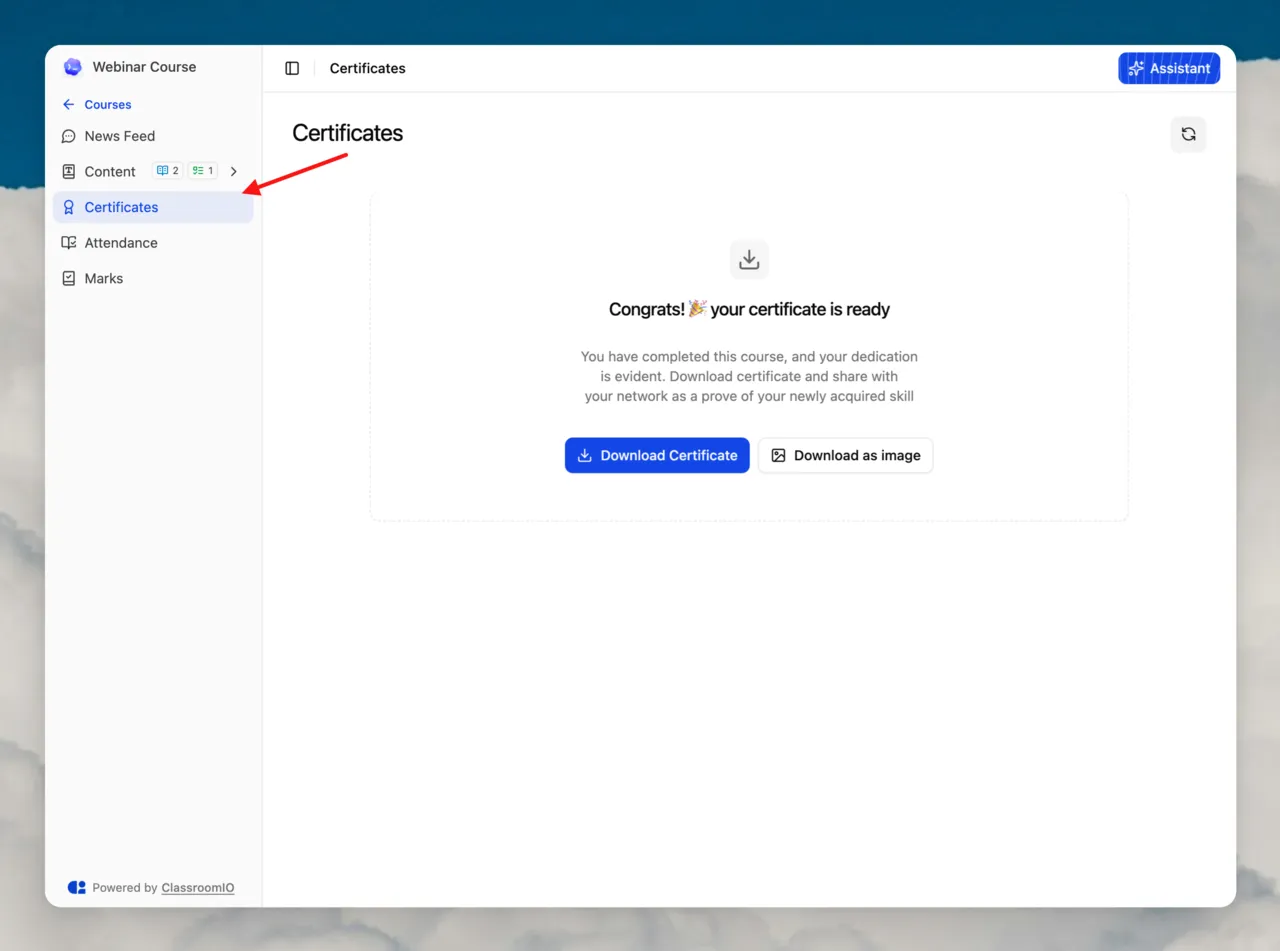
Once a student meets all the configured requirements, their certificate appears in the Certificates tab when they open the course in the LMS. They can view and download it from there.
Related guides
- How the Admin Dashboard Works — certificates issued and recent certifications on the org dashboard
- Create Your First Course — course setup overview
- Create an Exercise — create the exercise you reference as a final exercise
- Grade an Exercise — grade submissions before certificates are issued
- Control Course Progression: require completion before the certificate unlocks
- Student Dashboard — where students access their certificates