
Customize the Welcome Email
Write a custom message that students receive automatically when they enroll in a course.
Every course can send a personalized welcome email when a student enrolls. Use it to greet students, share what to expect, or include a link such as a live session URL.
Write the welcome message
1. Open course settings
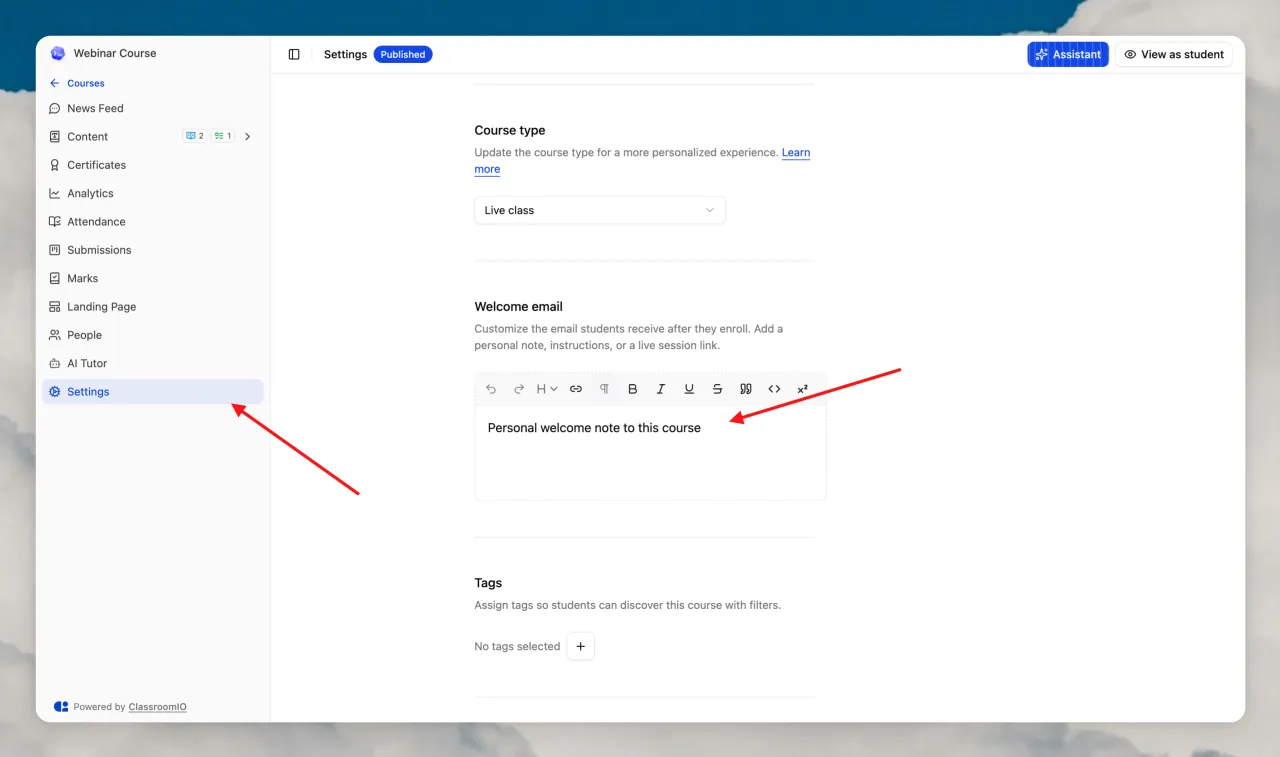
Go to the course’s Settings tab and find the Welcome email section.
2. Compose your message
Write your message in the rich-text editor. You can format text and add links, for example a welcome note plus your live session join link.
3. Save
Save the course settings. Your message is now used for new enrollments.
How it sends
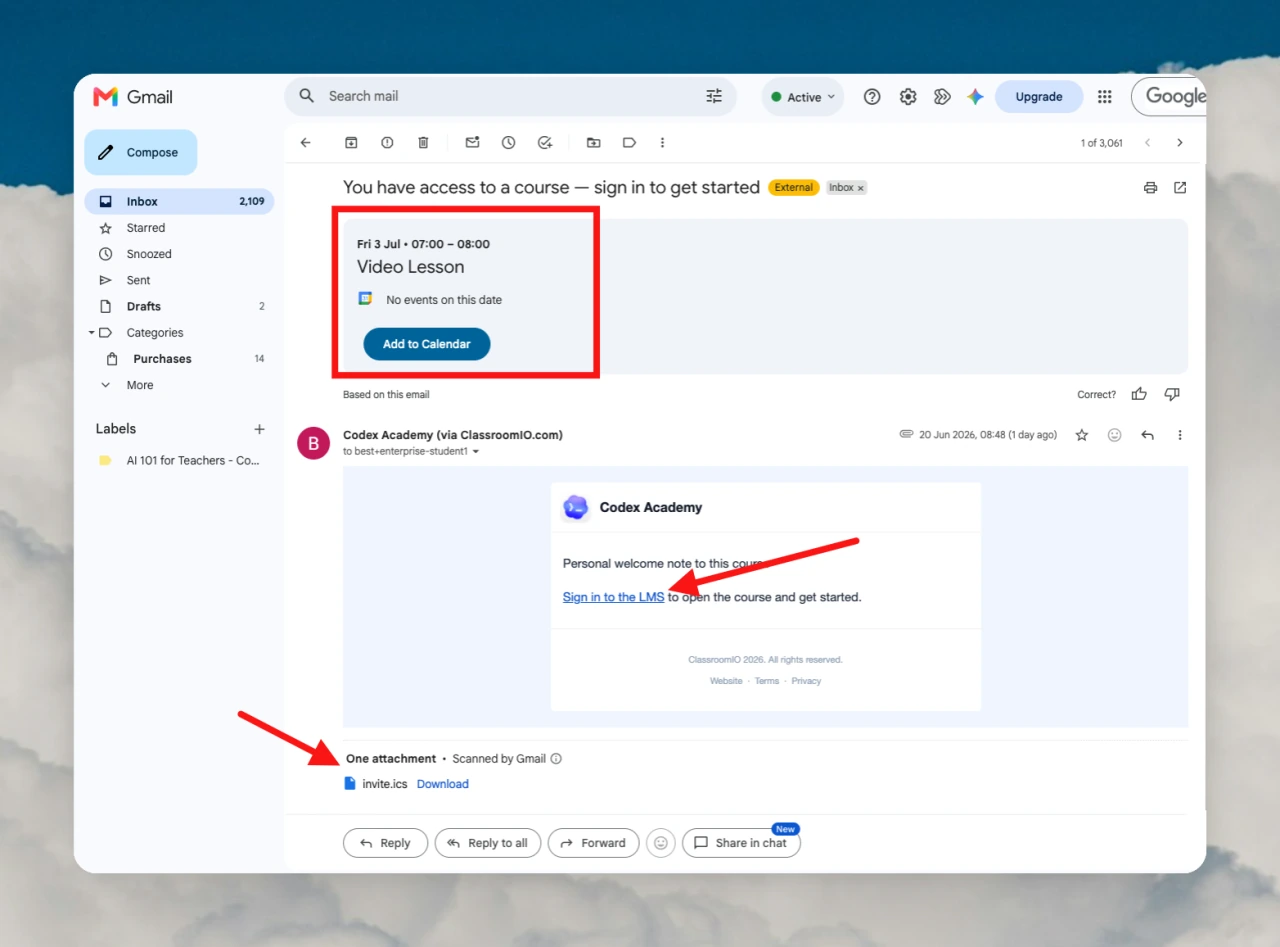
The welcome email goes out automatically whenever a student enrolls, whether they self-enroll, accept an invite, or are added from the audience. Your message appears in the email above the standard “Sign in to the LMS” link.
Live class courses: automatic session invite
For a Live class course with a scheduled session, the welcome email also attaches a calendar invite for the next session, so students can add it to their calendar the moment they enroll. You do not set this up here; it is pulled from the session you scheduled on the lesson. See Run a Live Class.
Related guides
- Invite Students: add students to a course
- How Course Enrollment Works: the enrollment flow
- Run a Live Class: include your session link in the welcome message