

Manage Your Audience
Filter students by usage, act on them in bulk, assign courses, manage invites, and import or export students in Edvello.
This guide covers the recurring Audience tasks: filtering by usage, bulk actions, assigning students to courses, managing pending invites, and importing or exporting. For what Audience shows and what each status means, see Audience.
Filter students by usage
Use the filter control above the table to narrow the list. Filters combine, and your selection lives in the page address, so you can bookmark a view or send it to a colleague.
- No login in and No activity in: 7, 30, 90 or 180 days, or never.
- Enrollment: enrolled, or not enrolled in anything.
- Completion: not started, in progress, or completed.
- Status: active, deactivated or archived.
- Invite status: active, pending, expired or revoked.
The saved views beside the filters cover the common questions in one click: never logged in, inactive 90+ days, inactive 180+ days, enrolled never started, and archived. Change any filter and the selector reads Custom filters.
To act on the result, see Find and Remove Inactive Students, which walks the whole review-and-archive loop.
Bulk actions
Tick students in the table, or use Select all matching to act on everyone the current filter returns, including when that is thousands of people.
Rows for invites that have not been accepted have no checkbox, because there is no account yet. “Select all matching” is filter-based, so it can still reach them.
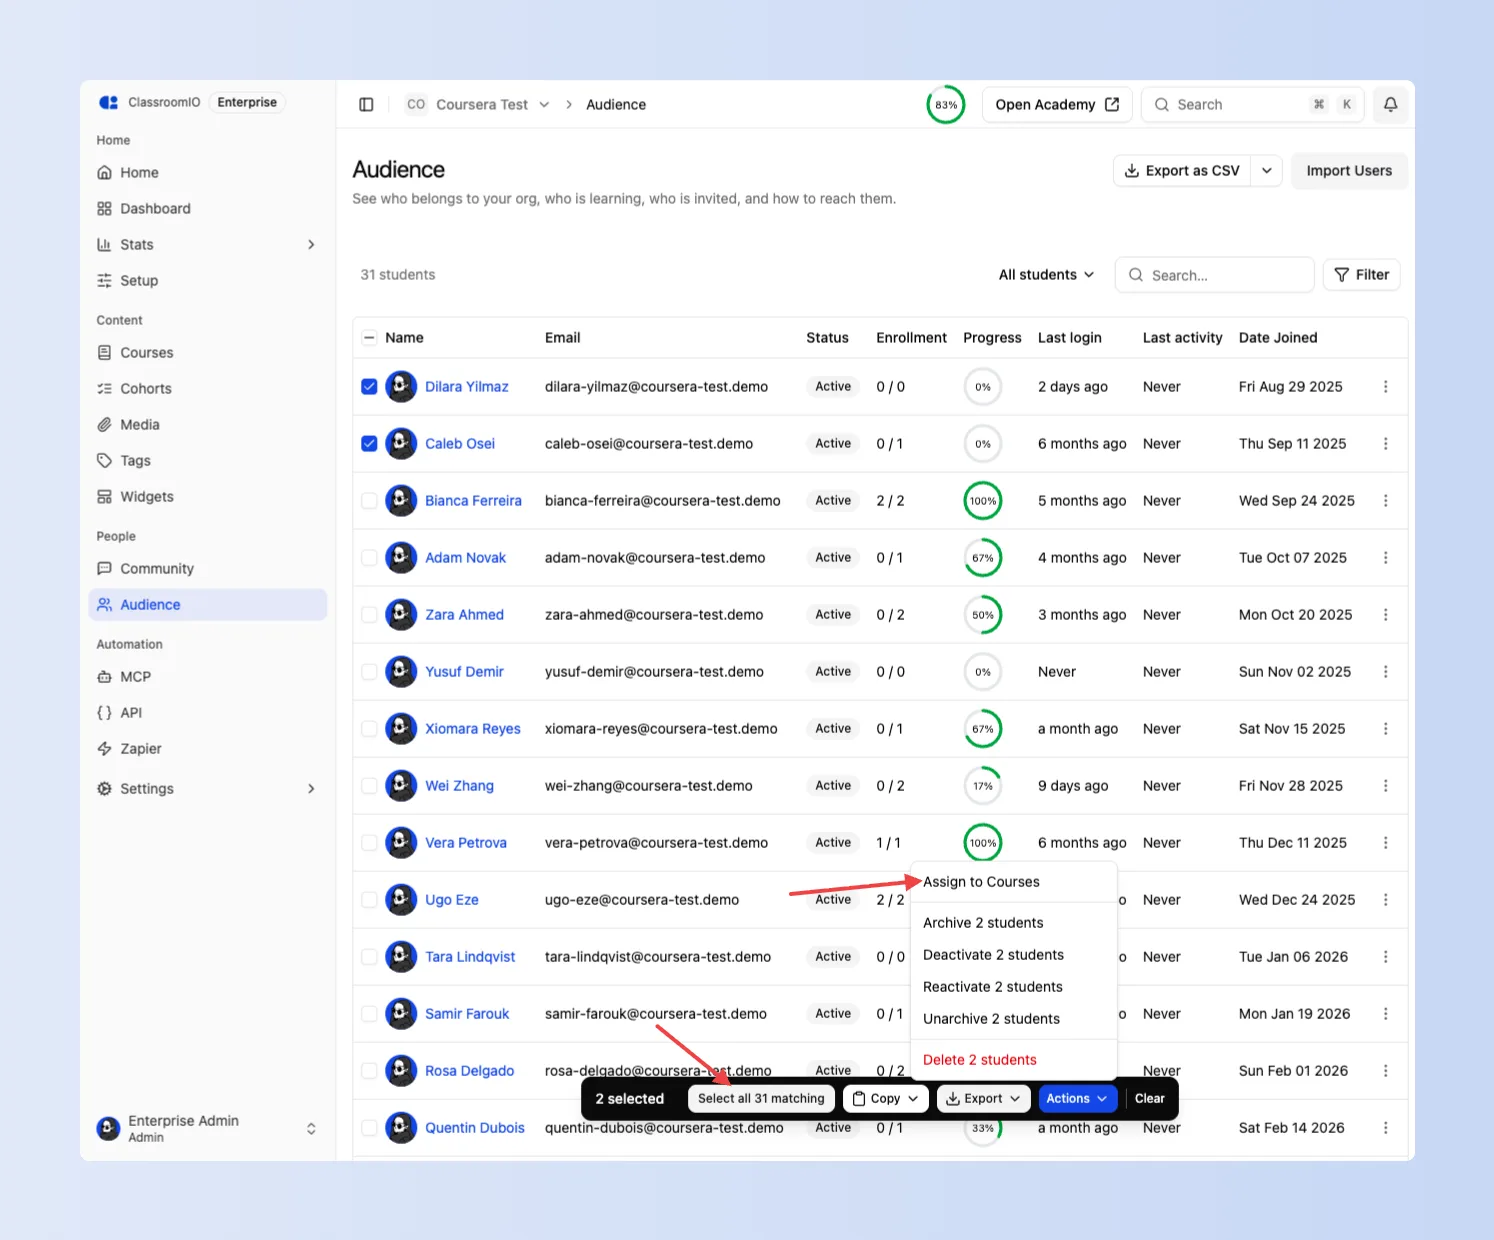
With a selection made, open Actions:
| Action | What it does | Reversible | Plan seat |
|---|---|---|---|
| Archive | Removes access, keeps the record | Yes, Unarchive | Frees a seat |
| Deactivate | Removes access, keeps the record | Yes, Reactivate | Keeps a seat |
| Reactivate | Restores a deactivated student | n/a | n/a |
| Unarchive | Restores an archived student | n/a | Takes a seat |
| Delete | Permanently removes them from your organization | No | Frees a seat |
Before anything is applied you confirm the exact number affected, and you can record an optional reason that is stored against each student so the decision is answerable later.
When you use Select all matching, the confirmation also lists a few example addresses and warns you if any of them are not archived yet. Ticking rows individually shows the count only, since you can already see who you picked.
Undo appears after an archive or a deactivate, for 15 minutes, and applies to exactly the students who changed. Reactivate, unarchive and delete cannot be undone. The Undo button lives on the page, so leaving or reloading it before you use the button clears the offer.
If the filtered list changed between the confirmation and applying it, a filter-based action stops and asks you to review again rather than acting on a set you did not see. An action on rows you ticked has no such check: anyone who has since been removed is quietly skipped, and anyone already in the target state is reported as unchanged.
Runs of more than 1,000 students continue in the background so you can keep working. Keep the tab open to see the result, because the notification arrives on this page and there is no email.
Assign students to courses
1. Select students
In the Audience table, check one or more students. Only members who already have an account can be selected this way. Rows for invites that haven’t been accepted yet don’t have a checkbox.
2. Open the assign dialog
Once you have a selection, a bar rises at the foot of the page showing how many students are selected. Open Actions and choose Assign to Courses.
3. Pick courses and confirm
In the Assign to Courses dialog, pick one or more courses from the list. Leave Send notification email checked (it’s on by default) to email the students you’re assigning, or clear it to give them access without notifying them. Click Assign.
Assignment happens immediately, and no action is needed from the students. The confirmation message reports how many students were newly assigned, how many already had access to a selected course, and how many emails were sent.
Manage pending invites
Open the actions menu (the ellipsis icon at the end of a row) for a student whose invite hasn’t been accepted yet:
- Resend invite sends a fresh invite email to that address. Available for Pending, Expired, and Revoked invites, so you can also use it to renew an invite that expired or was revoked by mistake.
- Revoke invite cancels the invite so the link stops working. Only available while the invite is still Pending.
These actions only show up for invite rows. Once a student has an account, their row no longer has invite actions in this menu.
Import students
Click Import Users in the top right of the Audience page. The button is disabled once your organization reaches its plan’s audience limit.
1. Upload a CSV, or paste addresses
Drop a CSV file onto the upload area, or click to choose one. Use Download the template if you want the expected shape.
| Requirement | |
|---|---|
| Format | CSV (.csv), UTF-8 |
| Columns | email (required), name optional |
| Limit | 1,000 students and 5 MB per import |
For more than 1,000 students, split the file and import it in parts.
If you would rather not use a file, paste addresses into the field below the upload area instead, one per line or separated by commas, then click Review.
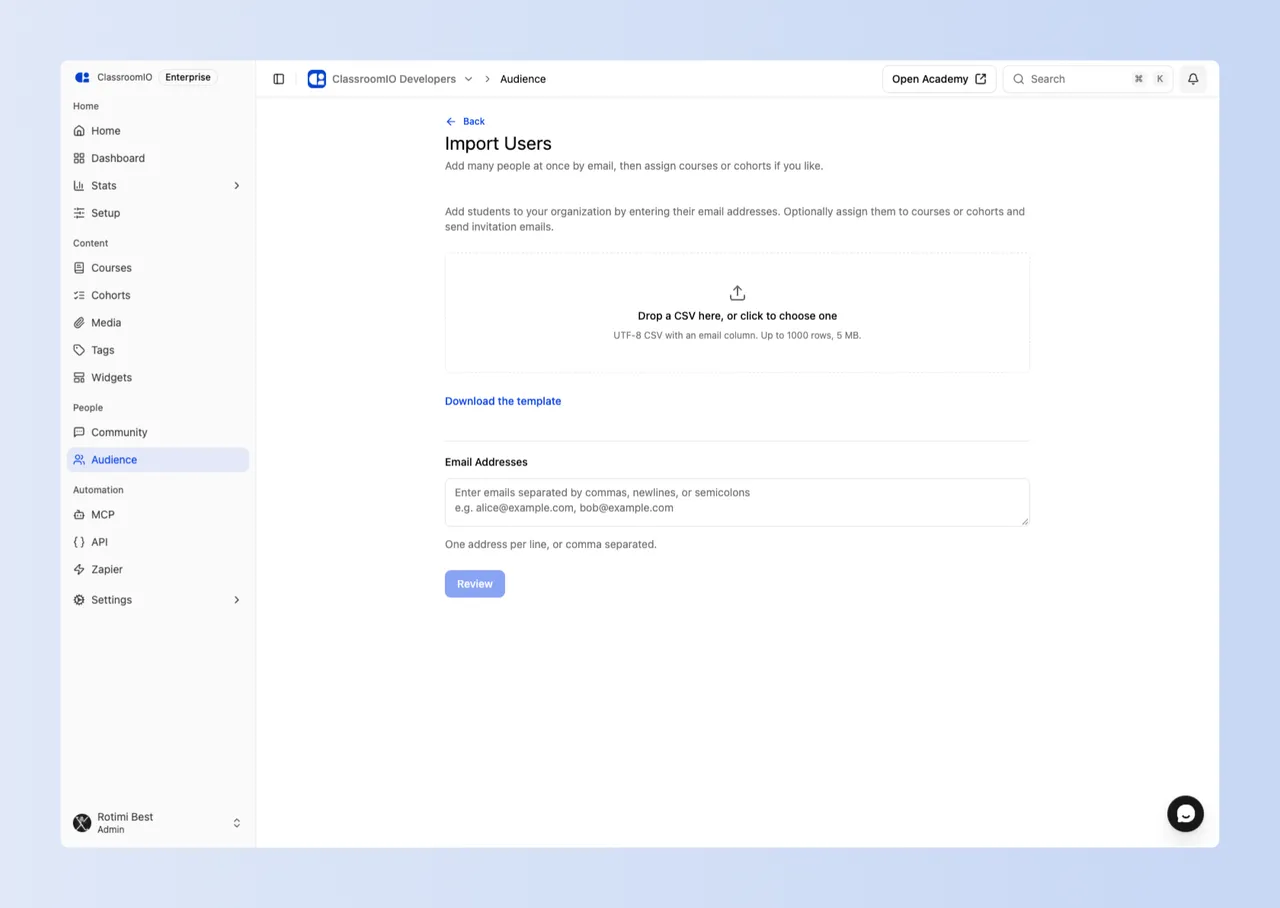
2. Review what will happen
Dropping a file takes you straight here. Every row is listed with the outcome it will get, and nothing is created until you submit from this screen.
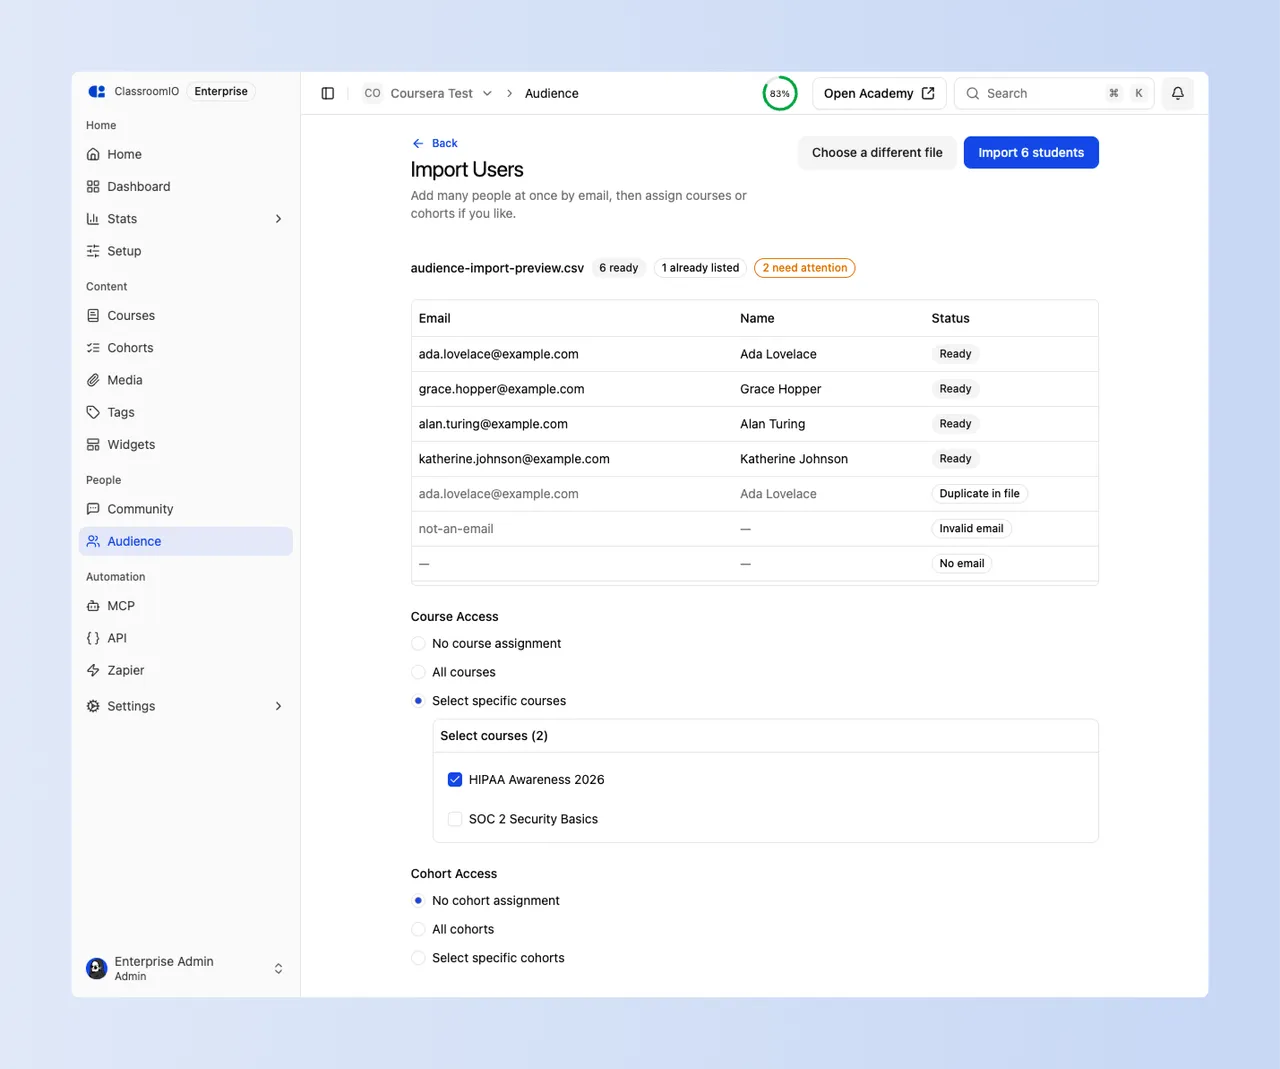
| Row status | Meaning |
|---|---|
| Ready | Will be invited |
| Already in audience | Skipped |
| Invalid email | Skipped |
| Duplicate in file | Skipped |
| Staff, not a student | Skipped, they are an admin or tutor |
| No seats left | Skipped, over your plan limit |
| No email | Skipped |
3. Choose course and cohort access
On the same screen, under Course Access, choose whether the imported students get no course assignment, all of your courses, or a specific set. Under Cohort Access, make the same choice for cohorts.
4. Submit
Click Import N students, which counts only the rows marked Ready.
New students receive an invitation email.
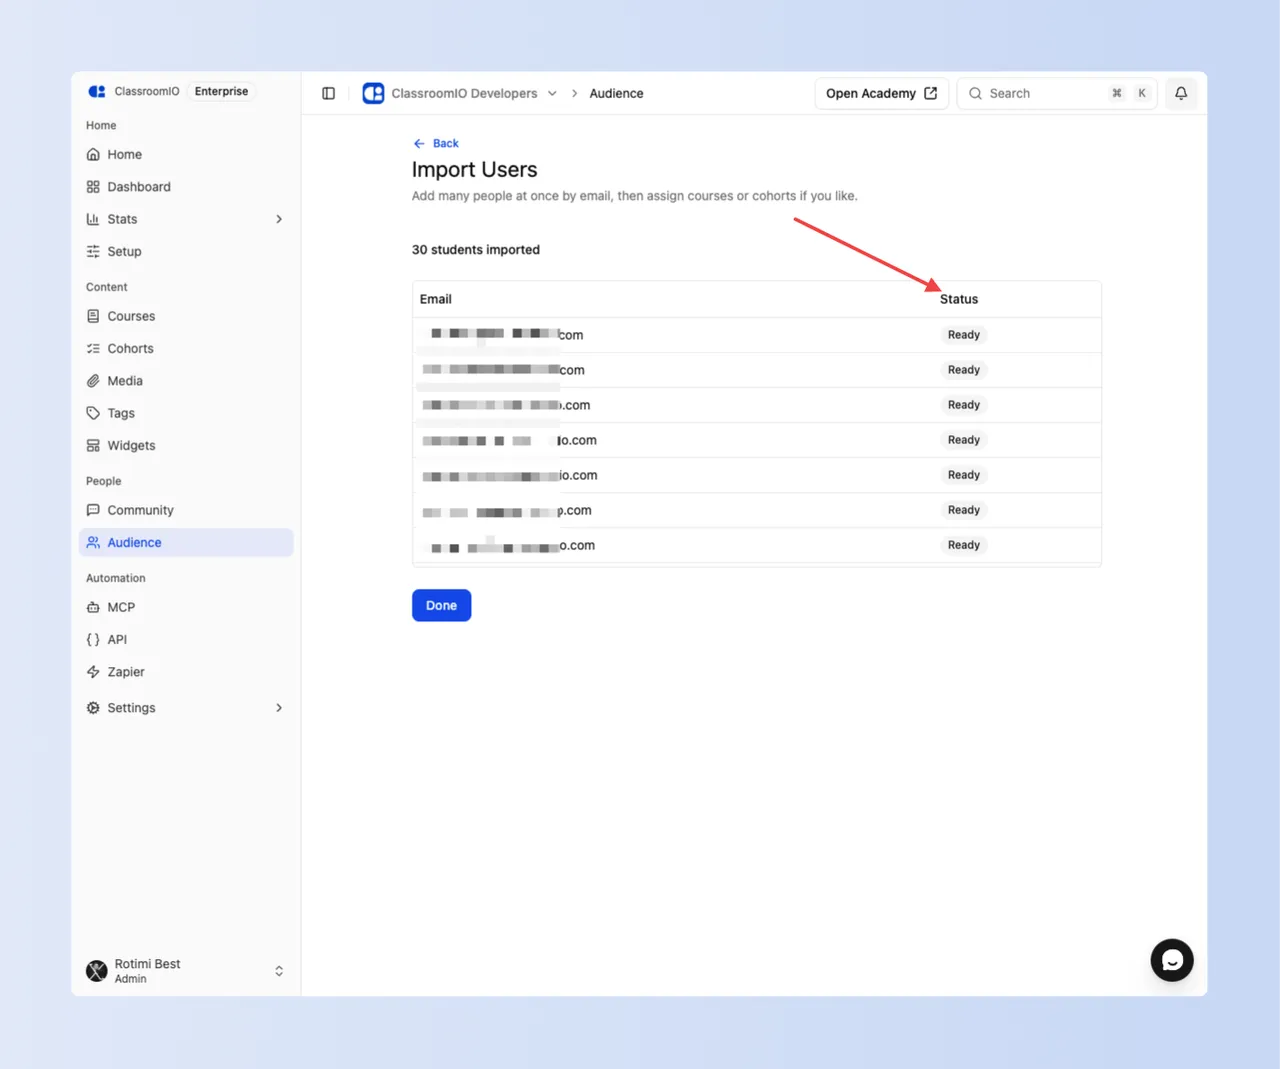
If some rows did not work, Download the rows that failed appears here and gives you a CSV of just those, with the reason for each, to fix and upload again.
Export students
Use the Export as CSV button above the table, or its dropdown for Excel, PDF and HTML.
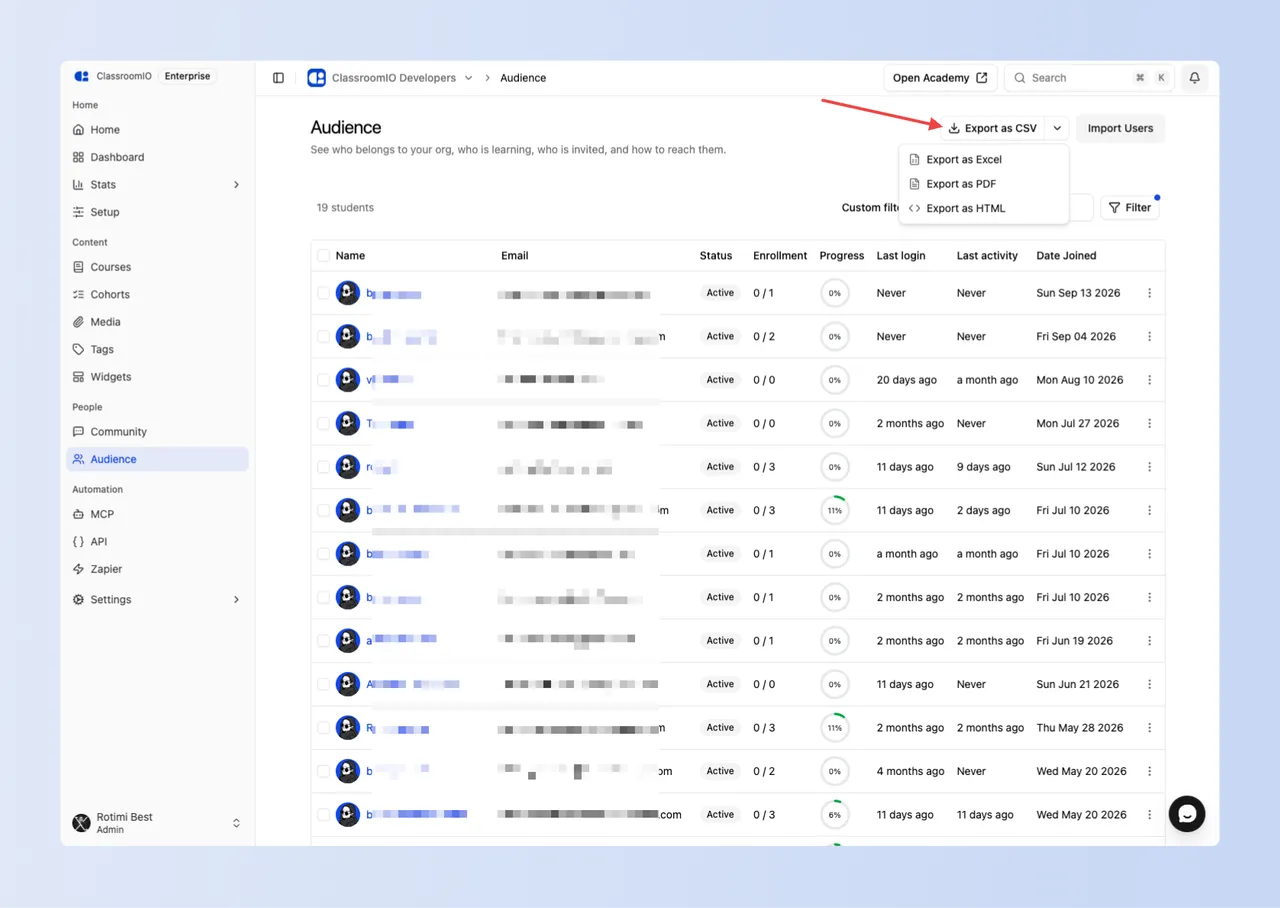
The export contains name, email, membership and invite status, courses enrolled, courses completed, progress, last login, last activity and date joined.
It follows what you have on screen: tick some rows and you get exactly those, otherwise you get everything matching the current filters. So the normal workflow is to filter first, export, circulate for sign-off, then come back and act.
For formats, limits and what the other exports contain, see Exports.
Related guides
- Audience — what Audience shows and what each status means
- Find and Remove Inactive Students — the full review-and-archive workflow
- Exports — formats, limits, and what each export contains
- How Course Enrollment Works — how students join courses
- Invite Students — send course-specific invites
- Roles and Permissions — difference between students and team members